Wix is one of the most-used website builders on the market. It gained its popularity due to the easy-to-use drag-and-drop editor, customizable themes, and wide range of apps offered.
The best part is – you can build any type of site using Wix, including an online store. It’s easy to set up and perfect even for beginners.
This article will provide you with everything necessary to create an online store with Wix and decide if it suits your business needs. In addition, we will show you how to integrate your store with dropshipping, making it possible to profit right away with minimal investment.
In This Article
Wix: Create a Website in 5 Easy Steps
It’s possible to build a Wix website in minutes. We’ll show you how to do it, from registering and setup to designing and connecting to a dropshipping provider.
1. Register With Wix
Go to the Wix homepage, and click on Get Started to create your account. Enter your personal data and email.
There are no limits to how many Wix sites can be built within one user’s account. However, each must be paid separately when acquiring premium plans. A Wix website cannot be transferred to another host or platform.
Wix Free Plan
You don’t need to register a credit card or pick a premium plan at this moment. It is possible to experiment with a free site that will display Wix ads on all pages.
Wix offers web hosting to this free website within an assigned Wix subdomain, which cannot be customized.
Besides that, the most significant limitation of the free plan is that you cannot accept payments within an online store, nor use Google analytics.
Wix free is a good option for experimenting with most platform resources and can be used to design limited and personal websites. Professional sites and eCommerce will require upgrading to a Premium plan.
2. Setup Your Wix Site
Once you create an account, Wix will collect information about the kind of website you intend to make. You can skip any of the questions, especially if you decide to build your site with the Wix artificial design intelligence (Wix ADI), which will repeat them.
However, if you opt for the Wix Editor, it’s a good idea to answer all of them, as it will make the subsequent steps much easier.
Choose the Type of Website You’re Creating
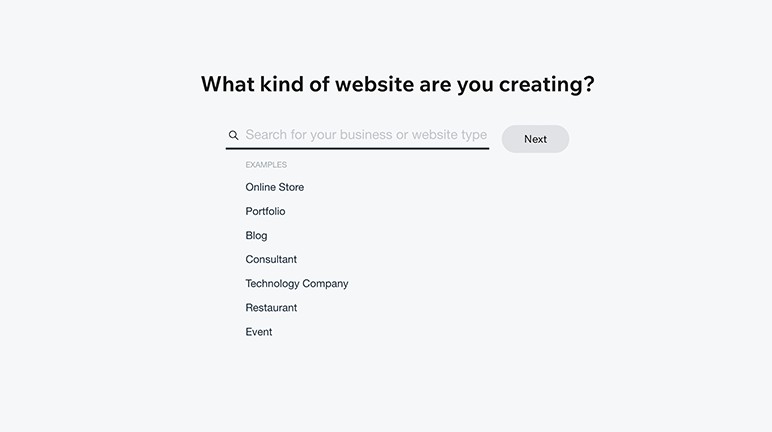
The first question to be answered is: What kind of website are you creating?
As a multipurpose website builder, Wix allows you to build online stores, portfolios, blogs, restaurants, or event websites, to mention a few. In this tutorial, we will focus on creating an online store.
Pick a Name
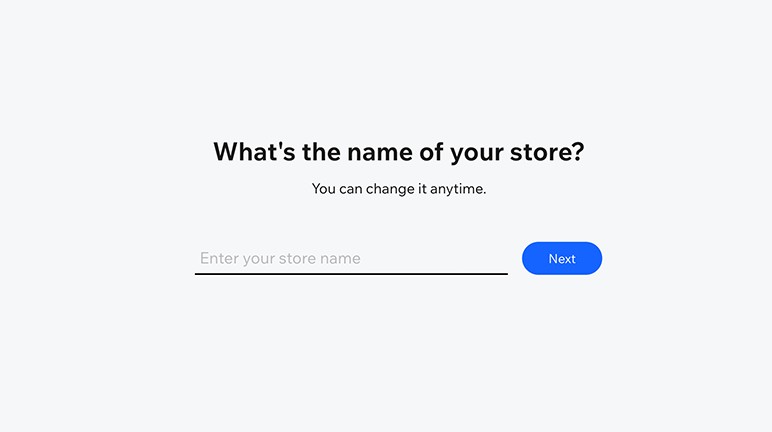
Wix will ask what the name of your store is. Make sure it is brandable, short, and memorable.
Using a name generator may be a good idea if you don’t already have your name.
Before using it in your store at Wix, check if the name is available for use as your own domain on DomainWheel so that you can pick a professional domain name matching your store perfectly.
Finally, check out how to trademark a name in this article on our blog.
Choose Additional Options
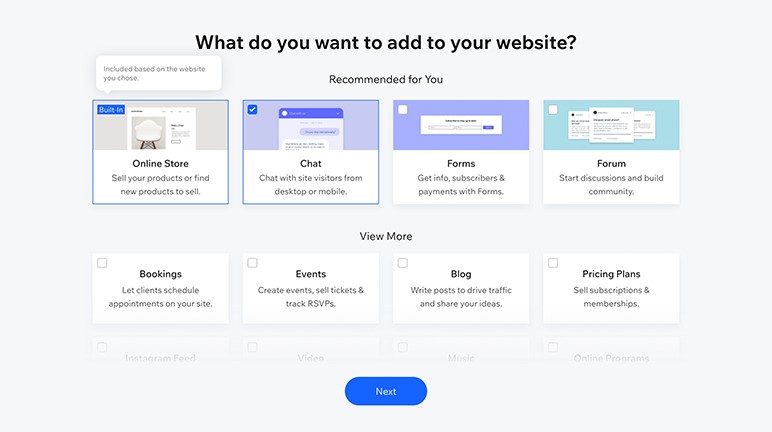
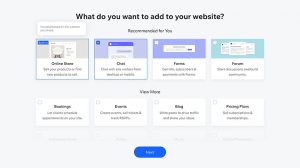
Next, Wix will ask what you want to add to your first website, offering recommended and additional features. That includes chat, forms, blog, forum, a booking system, or pricing plans.
Check all the boxes with the features desired to add to your Wix website. Avoid overstuffing the page with extensions that will not be used, because they consume resources and impact performance, even compromising the site’s SEO.
A live chat, for instance, is helpful for customer support but requires staff availability. A constantly unavailable Live Chat also speaks against a business. A blog assists in bringing traffic and making a website visible to the search engines, but only if regularly updated.
If you are unsure whether a feature will be needed, you can easily add it later.
After this step is complete, Wix will assess the user’s previous experience with website building – have you created Wix sites before? Depending on the answer, the page will direct you to Wix ADI or the Wix Editor.
Make It Happen Today!
3. Let’s Start Designing
Before deciding which editor to use to create your website, let’s get used to the Wix Dashboard.
The Wix Dashboard
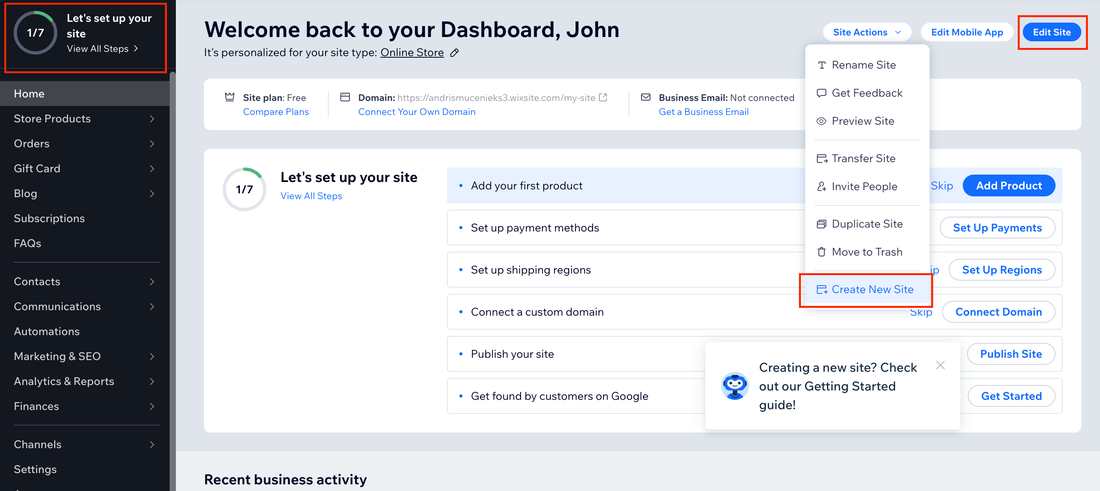
All the tools required to build a Wix website are located in the dashboard. You can access it at any point in the process. If you need to close the Wix home page for any reason, interrupting building the site, it is possible to return to the editor using the Edit Site button in the upper right corner of the dashboard.
The Wix dashboard offers a handy checklist in the top left corner, which is an easy way to keep tabs on the remaining steps to create and publish your website.
Click on Site Actions to create websites, then Create New Site. All websites can be easily accessed from the dashboard.
When creating a website using Wix, you will have to decide on using Wix ADI or the Wix Editor. This is the most crucial decision to take in the whole building process, but don’t despair – it’s always possible to build several personal sites for free with other options inside the platform, before publishing a page and acquiring a plan.
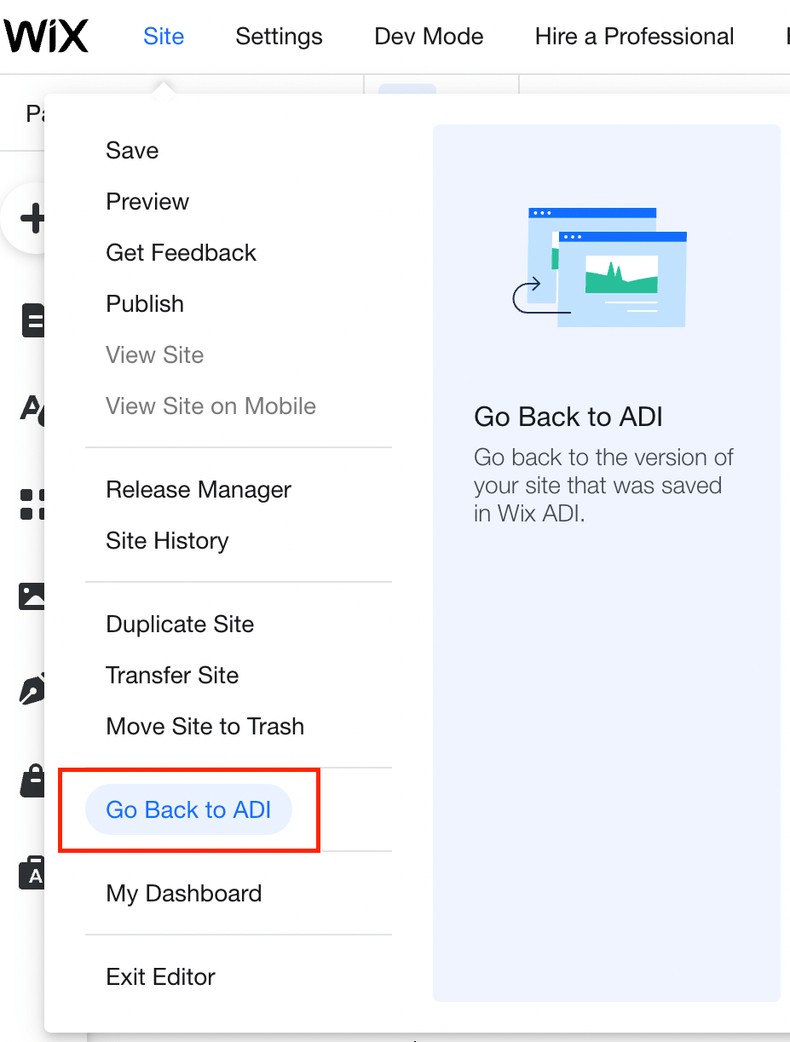
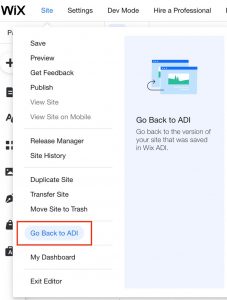
You can switch from Wix ADI to the Wix Editor and back, but if you have begun to create your site through the editor, you cannot switch to the ADI.
Wix ADI will automate many parts of the process, while the Wix Editor will allow more customization. If this is the first time creating your own website, it is advisable to design a test website first with the ADI.
Create a Website With Wix ADI
Wix ADI is an AI-based assistant editor. It creates a new site automatically based on your preferences and needs, as fast as possible.
During the initial setup, the editor may repeat some questions already answered. Do not skip the page containing recommended and additional features, and choose them carefully. Besides these, Wix ADI will query if you want to import images and text.
After that, it will ask you to review and edit your contact information, including your name, logo, email, and social media accounts.
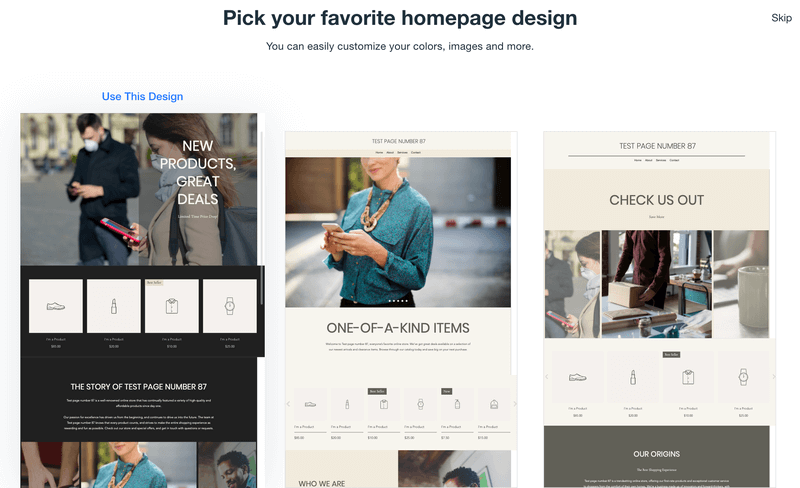
Finally, the editor will proceed directly to the webpage design step. You will be required to pick a theme.
These themes are different from the templates available with the Wix Editor, but you can build equally beautiful pages with them. Named by terms such as Retro, Clean, Humble, and Classic, they are color palettes and fonts that convey to the final customer a certain feeling of who you are.
Pick the one that best describes your brand, and Wix ADI will create customized homepage designs based on it.
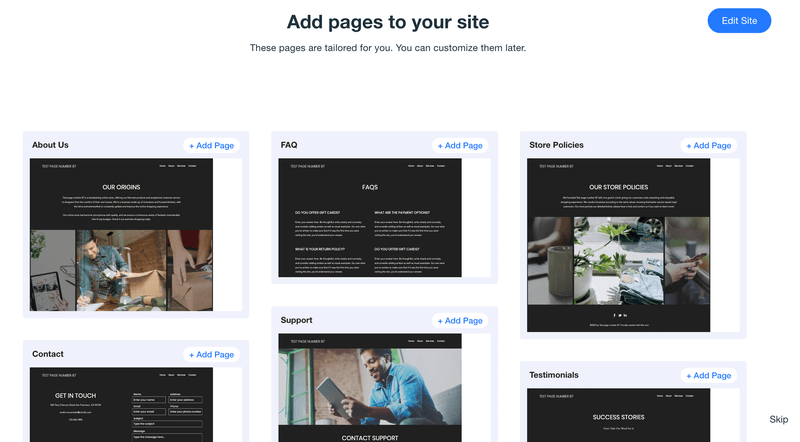
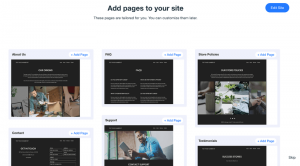
Finally, Wix ADI will ask you to choose which pages you want to add to your site, including About us, Support, Contact, or even a blank page.
Choose which pages you want, click Edit Site and you’re done! Wix ADI will create a complete website, containing working pages with the chosen resources.
Many parameters could be adjusted, such as text, titles, and pictures. You can even modify some page layouts.
Experienced users, however, may miss some extra customization, and additional tweaking will require switching to the Wix Editor.
Creating a Website With the Wix Editor
The Wix Editor is a widely popular drag-and-drop tool that builds websites from templates. It enables extensive customization of a Wix website.
Every element in a page can be edited individually and re-positioned by the visual editor.
It is highly recommended to follow the gridlines to avoid misalignment and respect the sections’ boundaries. This avoids inconsistent results, especially when switching to mobile devices, resulting in a professional-looking website.
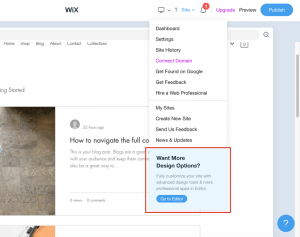
You can start building a website directly from the Wix Editor or transition from a site initially developed by Wix ADI. In the latter case, click on the Site menu, located in the upper right corner of the screen. Then choose the Go to Editor option at the bottom of the menu.
Choose a Template
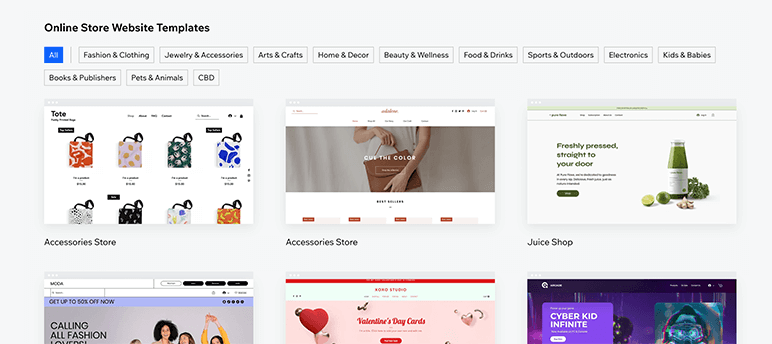
The start point for designing a website through the Wix drag-and-drop editor is picking a suitable template. There are plenty of options adjusted to different types of sites.
It is impossible to change a template once you start creating a website, but you can create many websites from an account using different templates.
Using the Wix Editor
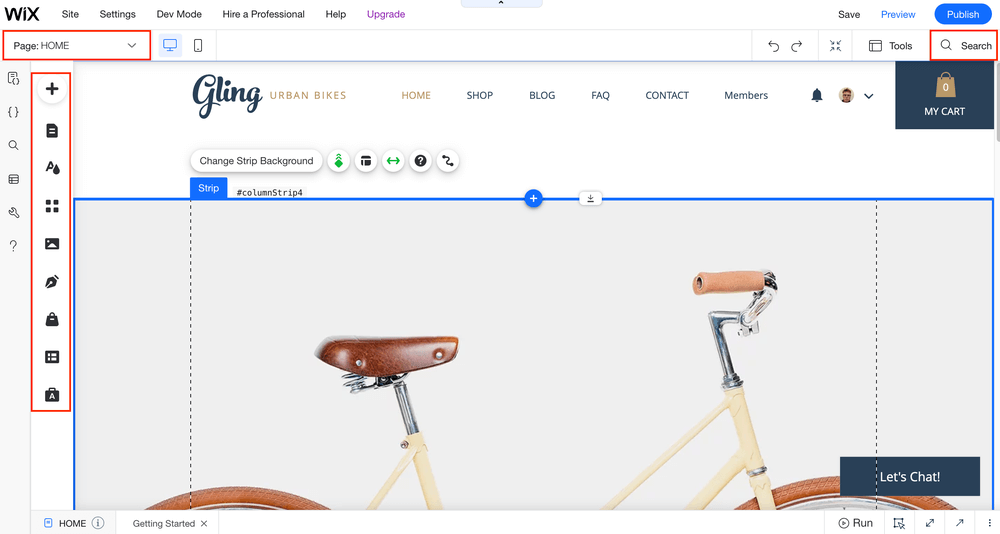
Wix Editor’s essential functions are listed in the left-hand side menu.
The page currently edited is selected through the Page option, located in the upper left corner, just below the Wix logo.
The Search bar in the upper right corner allows you to find functions within the editor itself. Double-clicking on any website element will re-direct the user to additional menus.
There is more than one way to access the same function. Product collections can be managed both in the My Store section and in Content Management, for instance. The important thing is to find what works the best for you.
These are the Wix Editor’s main features:
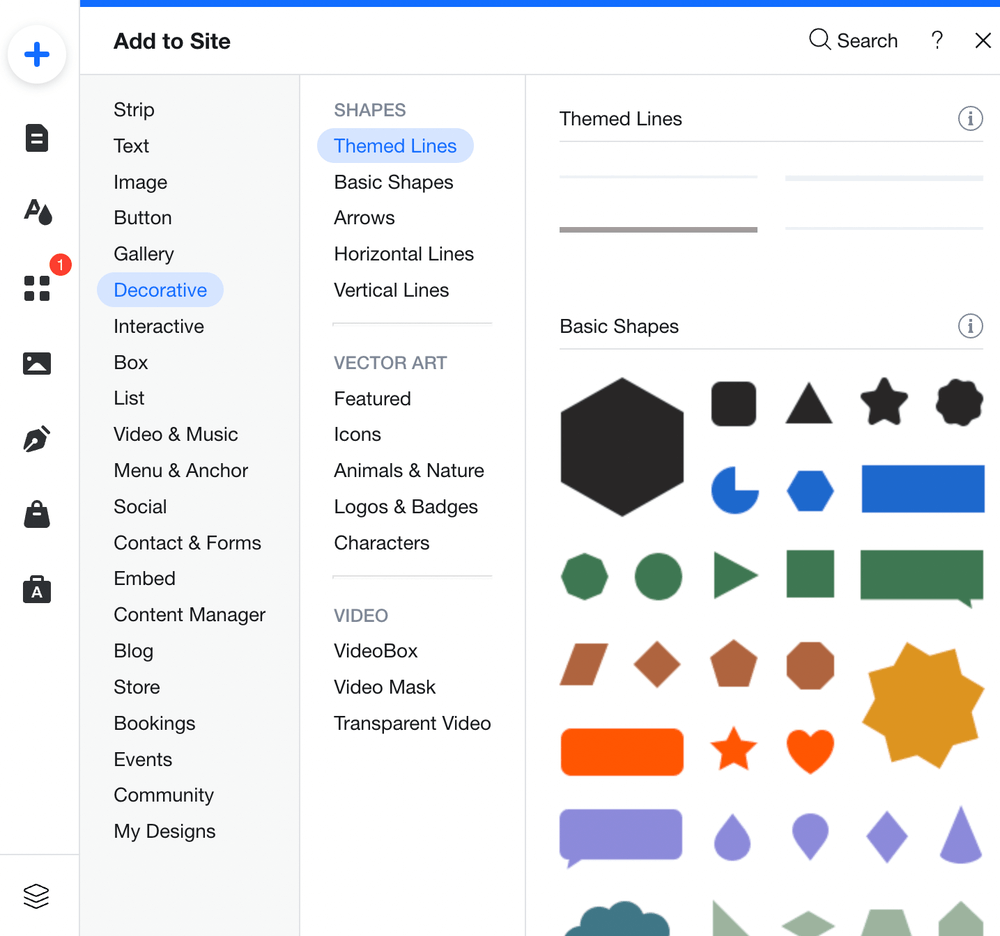
- Add button – This button brings together, in the same sub-menu, functions that are dispersed in other parts of the editor. It allows adding from design elements to complete pages, including code blocks.
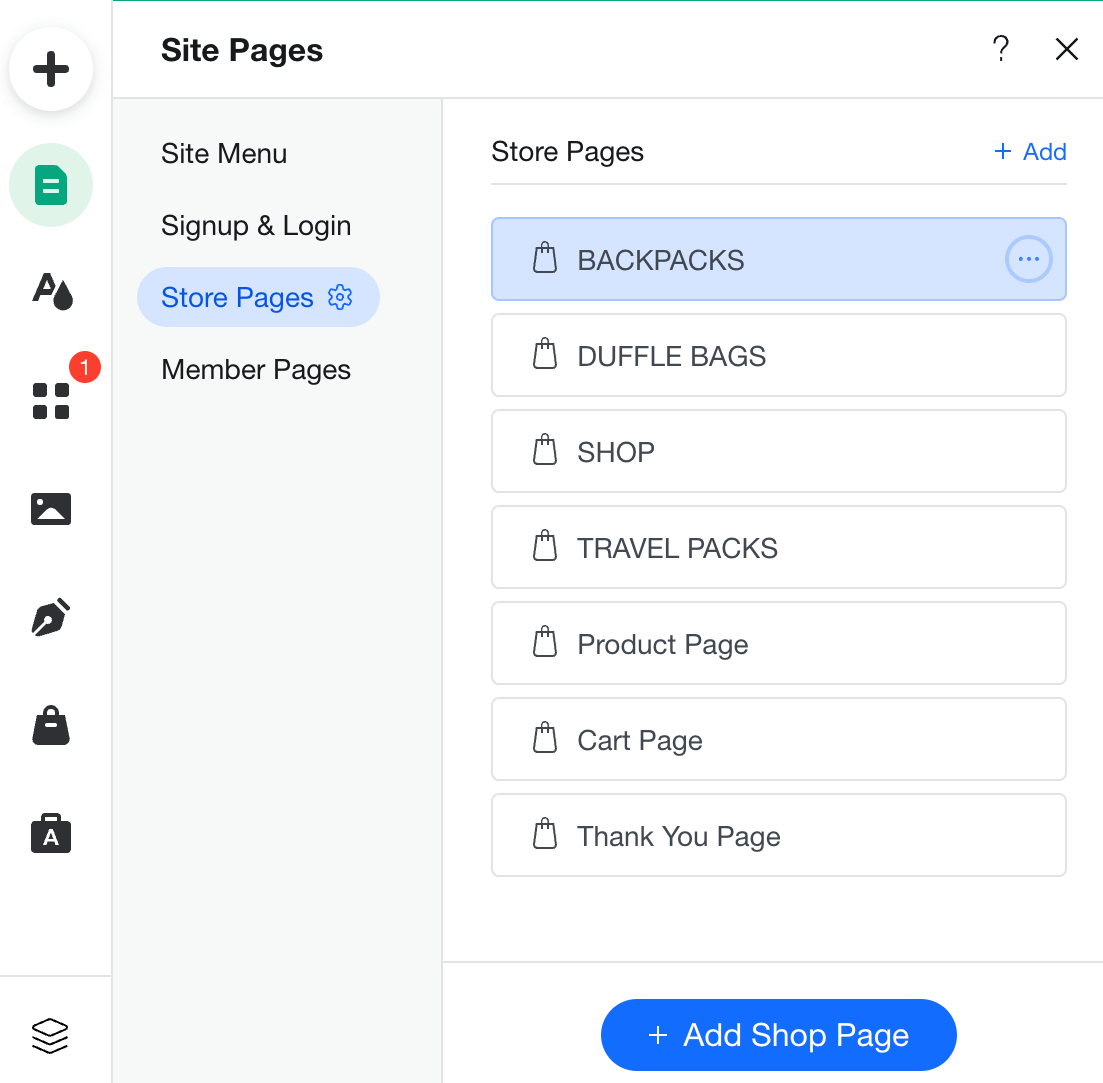
- Menu & Pages – This section allows you to change the site's structure, adding, altering. or removing pages.
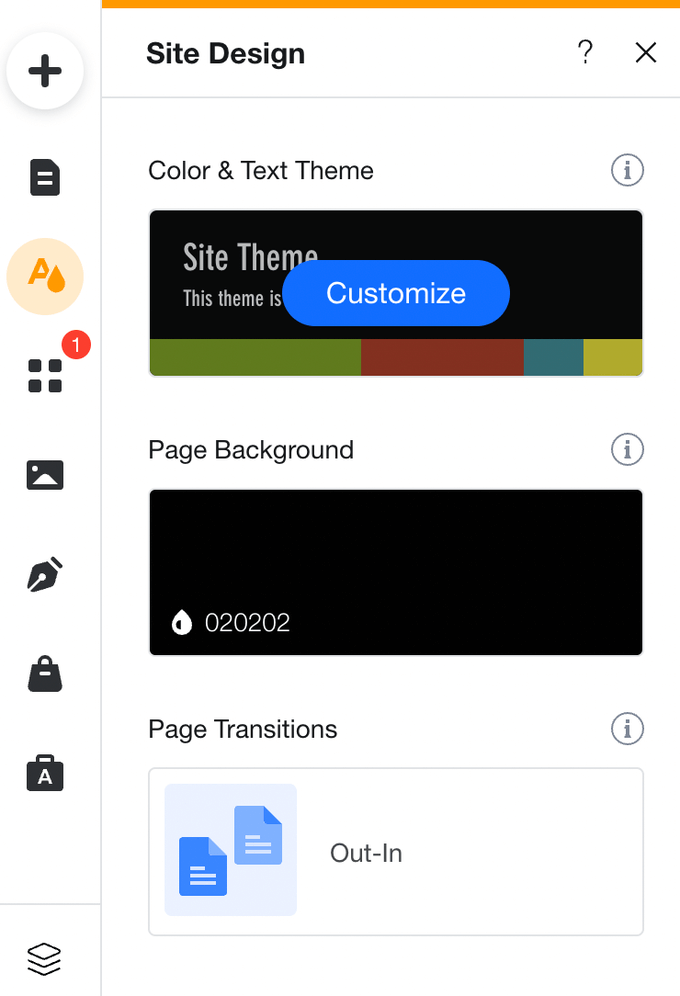
- Site Design – Allows you to customize palettes, change the page background, and add transitions.
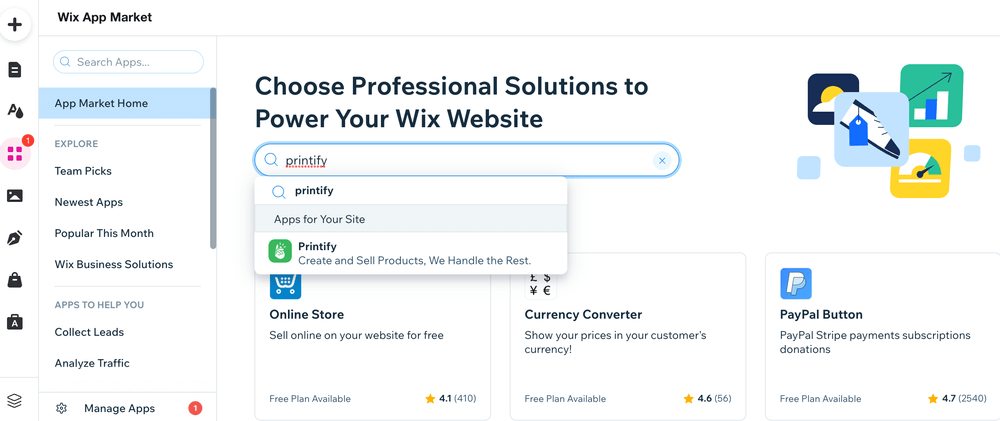
- Add Apps – Essential for the functionality of any Wix website, this menu allows you to add features through the Wix app market.
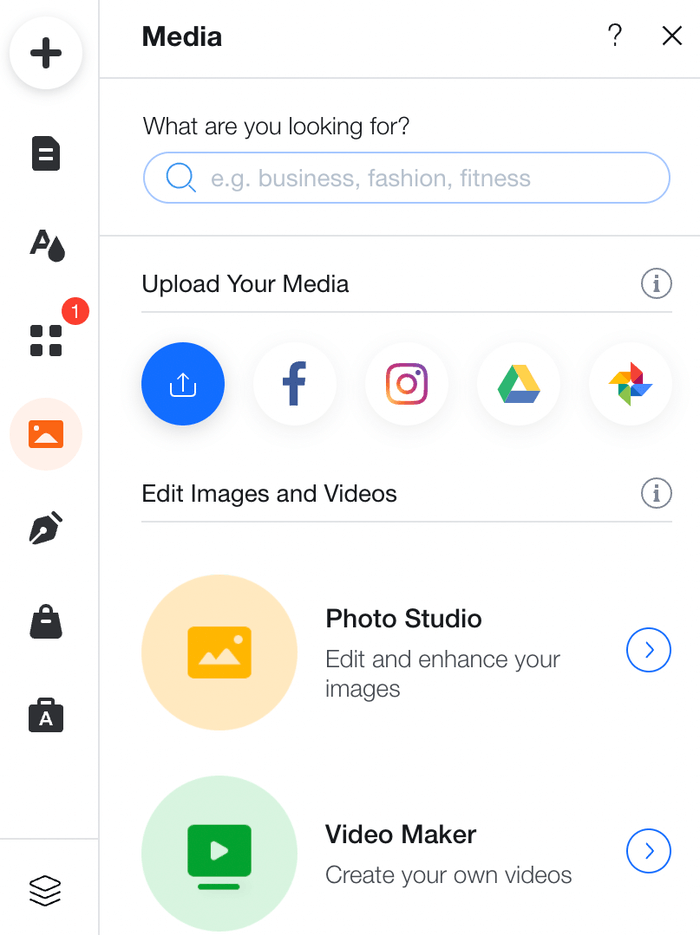
- Media – This section allows you to upload and edit images and videos from a device, cloud, or social network. Media can also be added from Wix, Shutterstock, and Unsplash.
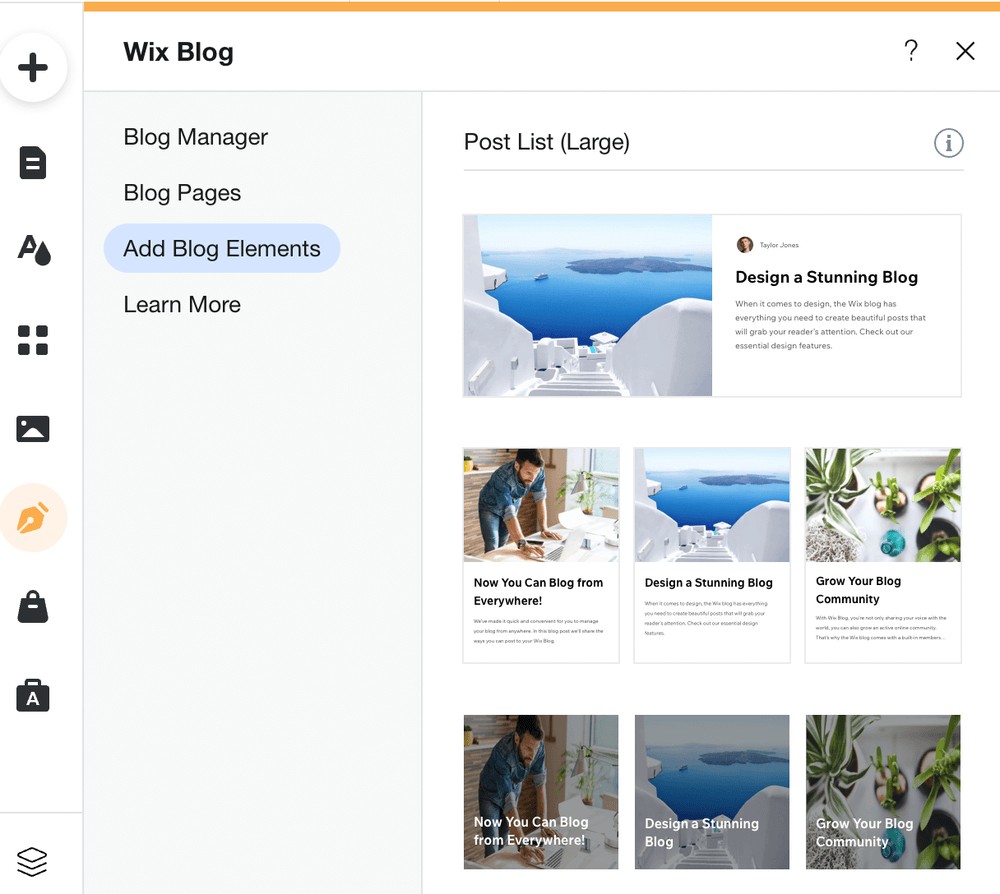
- My Blog – This section lets users add blog elements and create, edit, and manage pages and posts. The Wix blog menu includes Category menus management, Tag clouds, Archives, and post lists in a sidebar. Finally, it also allows inserting widgets such as RSS Buttons, Social Media, and Google AdSense.
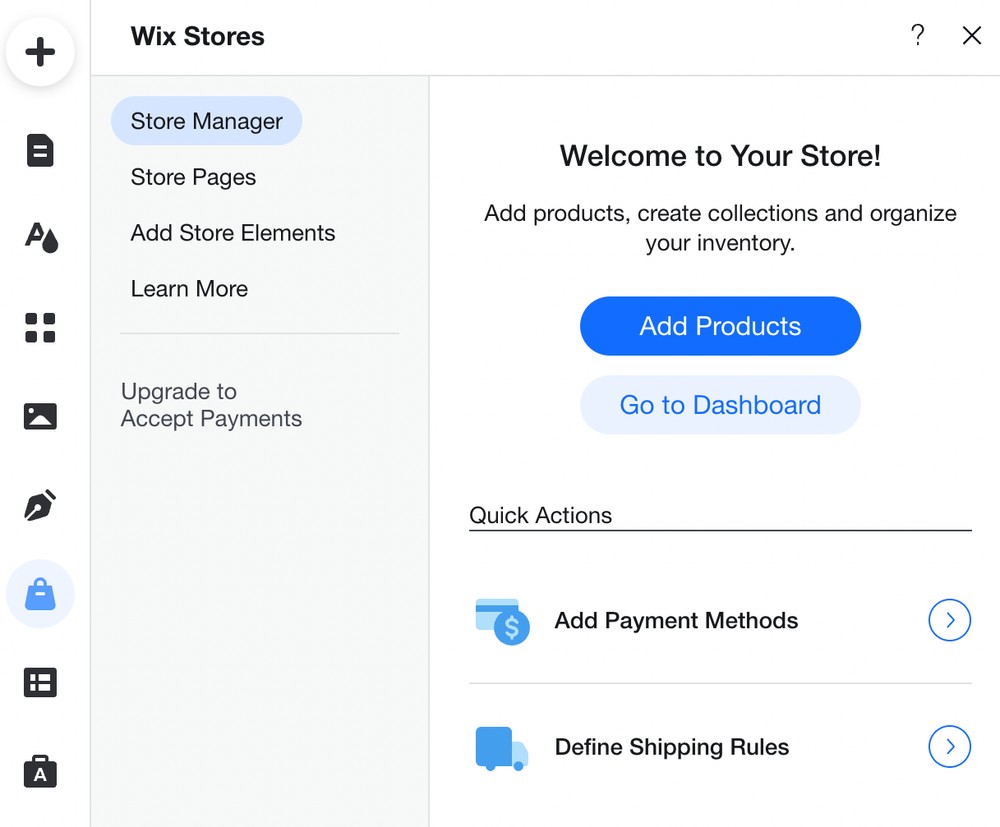
- My Store – All aspects of the online store can be managed from this menu, from adding products and organizing collections to managing inventory.
It is easy to add store pages and elements directly from the menu, which also provides links to the help center, tutorials, and forum.
Advanced features, such as adding payment methods and defining shipping rules, are accessed via this menu, but the user will be redirected to the Wix dashboard.
Payment options vary according to the user’s location, with Stripe, Paypal, and manual payments being the most widespread solutions. Stripe allows accepting payments from debit and credit cards.
Every digital payment option adds specific fees to the transactions.
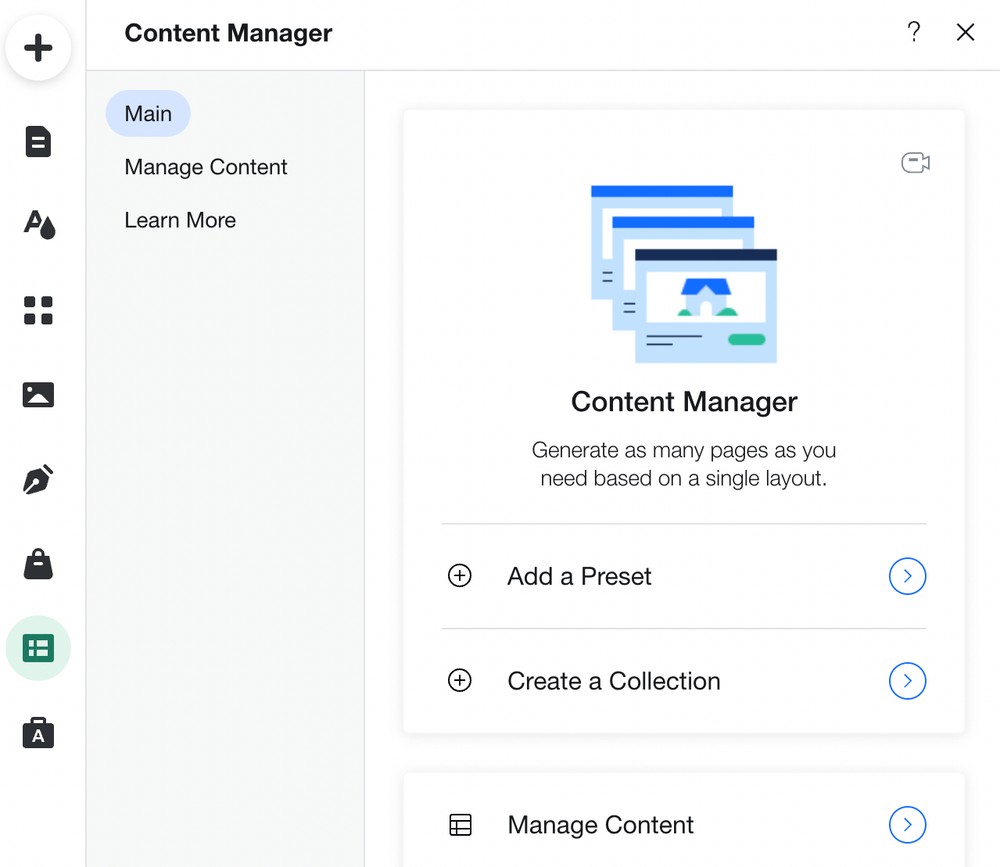
- Content Manager – This menu enables you to manage all the content of your Wix site through collections. Wix provides default collections for managing members, subscribers, categories, posts, and tags for blogs.
Store content collection allows easy editing of product collections, abandoned carts, inventory items, and products and variants.
You can create content collections in this section as per your need, and Wix also provides some presets for creating custom lists. Some of the available presets help organize job vacancy lists, cooking recipes, team members, projects, or services.
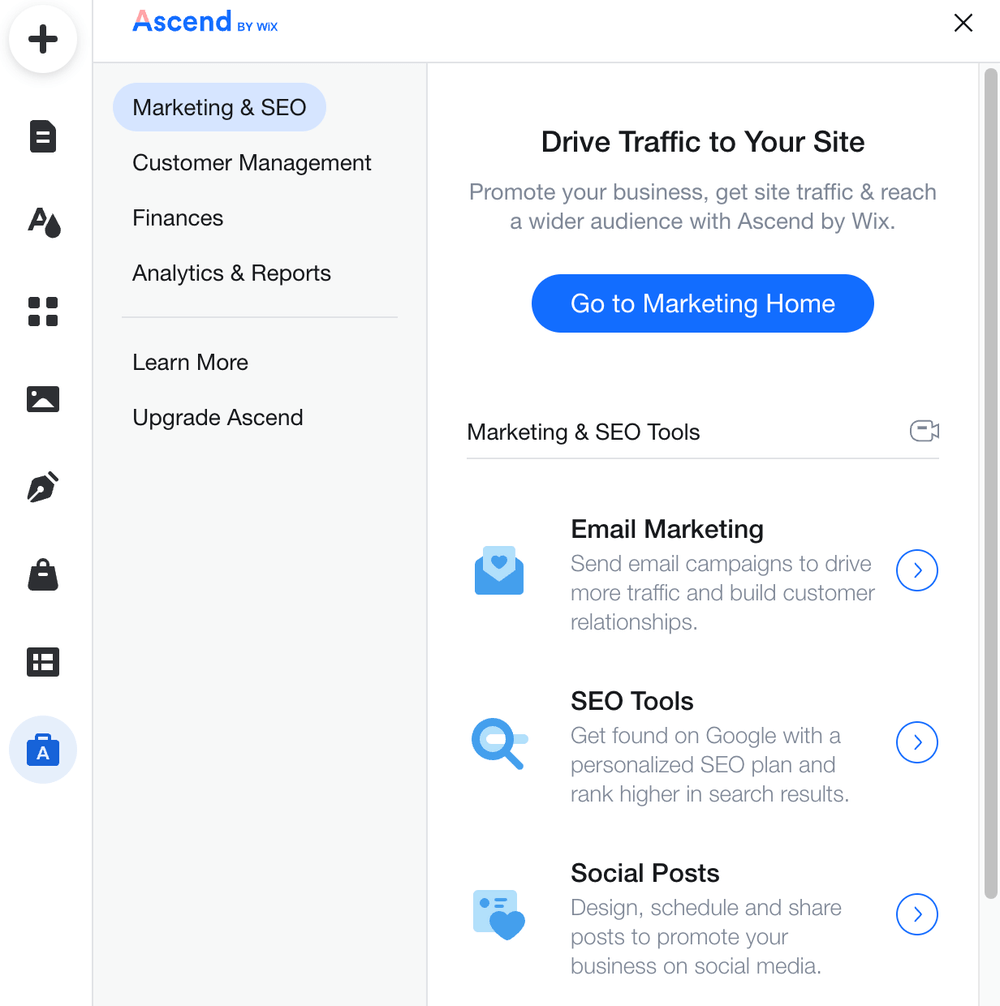
- Ascend Business Tools – Ascend by Wix manages marketing tools and Wix's SEO settings. Moreover, it offers analytics, reports, and advanced business-related features such as price quotes, invoices, financial integrations, and additional payment options.
Wix’s SEO optimization resources can also be accessed directly from the Marketing & SEO section of the Dashboard. By clicking on Get found on Google, the user is redirected to the Wix SEO Wiz, a wizard for SEO optimization available from the free plan.
Ascend Free enables limited access to Forms, Email Marketing, Chat, Automations, Social Posts, and more.
Additional marketing and SEO tools will require upgrading to a Premium Ascend plan, which ranges monthly from $10 to 49$. Some features, such as the Logo Maker, require purchasing a separate plan for creating a professional logo and social media logo files.
We recommend watching this in-depth Wix tutorial for additional information on the Wix Editor resources.
Advanced Customization
A professional website may require designing specific elements and functions, additional SEO optimization, and in-depth tweaking. If this is the case, Wix provides other options for deep customizing:
Velo by Wix, CSS and HTML Edition
For those with some coding proficiency, Wix offers additional features for in-depth editing:
- The Embed section, below the Add to Site button, allows advanced editing, including embedding snippets of code and custom elements to Wix pages.
- Velo by Wix, an editor intended for developers, can be installed by the same section, or accessed simply by clicking on the Dev mode option located on the top menu of the Wix Editor.
Hiring a Professional
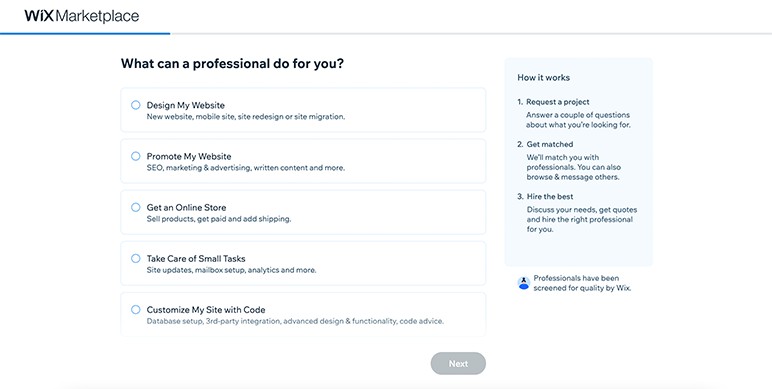
Wix connects its users to a network of professionals through the Wix Marketplace, allowing them to hire a developer or web designer who may take charge of specific customizations or even build the entire website.
Fill Everything With Your Information
Now that you’ve chosen the most suitable template for your project and familiarize yourself with the features of the Wix editing tools, it’s time to add all the information required on the existing pages:
- If you created your site with the Wix Editor, add the name of your online business where needed, and add personal and business information in sections like About Us and Contact. Wix ADI automates these steps.
- Add products and organize them into collections via the My Store and My Collection menus, or the Add button. When integrating your store with a dropshipping provider such as Printify, products are automatically added from the partner's side.
- Take the time to write your Terms and Conditions, which may be partially based on your dropshipping partner's terms. These may include information such as returns, refunds, shipping policies, and other details that may prevent issues with potential customers.
4. Save Everything and Preview Your Website
The Save, Preview, and Publish buttons are located together in the upper right corner of the editor’s main menu.
Be sure the autosave option is enabled, and frequently save the edits to the site.
Use the Preview function to test your site before publishing.
Make sure that there are no broken links and that you can always return to the home page. Observe the presentation of products and collections. Click on Back to editor, in the upper left corner, if any modification is necessary.
Make Your Site Responsive
The Wix Mobile Editor lets the user optimize the page layout of Wix websites and makes your site mobile-friendly. It makes it possible to move, re-dimension and hide elements such as pictures, and replace desktop items with mobile-only content.
Any changes made with the mobile editor will not affect how the laptop site looks.
There are two ways to optimize your website layout for mobile devices through this editor:
- The first is accessing it on the laptop through the Switch to mobile button in the upper right corner next to the Wix logo. Clicking on the button will display how the site should be viewed on mobile devices.
- Still, it is possible (and recommended) to access the mobile editor directly from a smartphone. Use it to check the layout of all pages, making sure no text or images are outside of the margins.
5. Time to Publish and Go Live
Once your store is designed and checked on laptops and mobile devices, it’s time to publish it and make your business online.
Once everything is done, click on the Publish button at the top left corner.
Although the store can be published and the items are added to the cart, selling is only possible after upgrading to a premium plan.
After purchasing a plan, you will also be able to replace the assigned free domain with a free custom domain, which should be registered after one year. All plans provide a free SSL certificate.
Pick a Plan
Wix offers a decent range of features for small and medium businesses, from the Basic Business plan, including unlimited products, POS, Abandoned Cart Recovery, and integration with Social Media. Additionally, Wix does not charge transaction fees independently of the plan.
eCommerce stores intending to scale, however, should consider upgrading. Specific features to be considered are multiple currencies, automated tax, and advanced analytics, besides the different storage provided depending on the plan.
These are the main differences between the Wix plans:
| Wix Business Basic | Wix Business Unlimited | Wix Business VIP | |
|---|---|---|---|
| Monthly cost (paid annually) | $23 | $27 | $49 |
| Storage | 20 Gb | 35 Gb | 50 Gb |
| Bandwidth | Unlimited | Unlimited | Unlimited |
| Free domain name | X | X | X |
| Unlimited products | X | X | X |
| Points of Sale | X | X | X |
| Gift cards | 3rd party app | 3rd party app | 3rd party app |
| Accept donations | 3rd party app | 3rd party app | 3rd party app |
| Sell subscriptions | – | X | X |
| Abandoned cart recovery | X | X | X |
| Customer accounts | X | X | X |
| Sells on social media | X | X | X |
| Transaction fee | – | – | – |
| Advanced/Customized analytics | – | – | X |
| Multiple currencies | – | X | X |
| Automated Sales Tax | – | 100 transactions per month | 500 transactions per month |
| Dropshipping by Modalyst | – | Up to 250 products | Unlimited |
| Monthly cost (paid annually) | |
|---|---|
| Wix Business Basic | $23 |
| Wix Business Unlimited | $27 |
| Wix Business VIP | $49 |
| Storage | |
| Wix Business Basic | 20 Gb |
| Wix Business Unlimited | 35 Gb |
| Wix Business VIP | 50 Gb |
| Bandwidth | |
| Wix Business Basic | Unlimited |
| Wix Business Unlimited | Unlimited |
| Wix Business VIP | Unlimited |
| Free domain name | |
| Wix Business Basic | X |
| Wix Business Unlimited | X |
| Wix Business VIP | X |
| Unlimited products | |
| Wix Business Basic | X |
| Wix Business Unlimited | X |
| Wix Business VIP | X |
| Points of Sale | |
| Wix Business Basic | X |
| Wix Business Unlimited | X |
| Wix Business VIP | X |
| Gift cards | |
| Wix Business Basic | 3rd party app |
| Wix Business Unlimited | 3rd party app |
| Wix Business VIP | 3rd party app |
| Accept donations | |
| Wix Business Basic | 3rd party app |
| Wix Business Unlimited | 3rd party app |
| Wix Business VIP | 3rd party app |
| Sell subscriptions | |
| Wix Business Basic | – |
| Wix Business Unlimited | X |
| Wix Business VIP | X |
| Abandoned cart recovery | |
| Wix Business Basic | X |
| Wix Business Unlimited | X |
| Wix Business VIP | X |
| Customer accounts | |
| Wix Business Basic | X |
| Wix Business Unlimited | X |
| Wix Business VIP | X |
| Sells on social media | |
| Wix Business Basic | X |
| Wix Business Unlimited | X |
| Wix Business VIP | X |
| Transaction fee | |
| Wix Business Basic | – |
| Wix Business Unlimited | – |
| Wix Business VIP | – |
| Advanced/Customized analytics | |
| Wix Business Basic | – |
| Wix Business Unlimited | – |
| Wix Business VIP | X |
| Multiple currencies | |
| Wix Business Basic | – |
| Wix Business Unlimited | X |
| Wix Business VIP | X |
| Automated Sales Tax | |
| Wix Business Basic | – |
| Wix Business Unlimited | 100 transactions per month |
| Wix Business VIP | 500 transactions per month |
| Dropshipping by Modalyst | |
| Wix Business Basic | – |
| Wix Business Unlimited | Up to 250 products |
| Wix Business VIP | Unlimited |
Third-party features can be added from the Wix app market and may require additional subscriptions.
Make It Happen Today!
Integrate Wix With Printify
Connecting a Wix website site with Printify from either the Wix or Printify side is possible. Here’s how to do it:
From Printify’s Side
- Before integrating, log in to your Wix account.
- Log in to your Printify account.
- Click in at the My Store menu at the top right corner, then Manage My Stores, and Connect.
- Allow Printify to access your Wix account.
From Wix’s Side
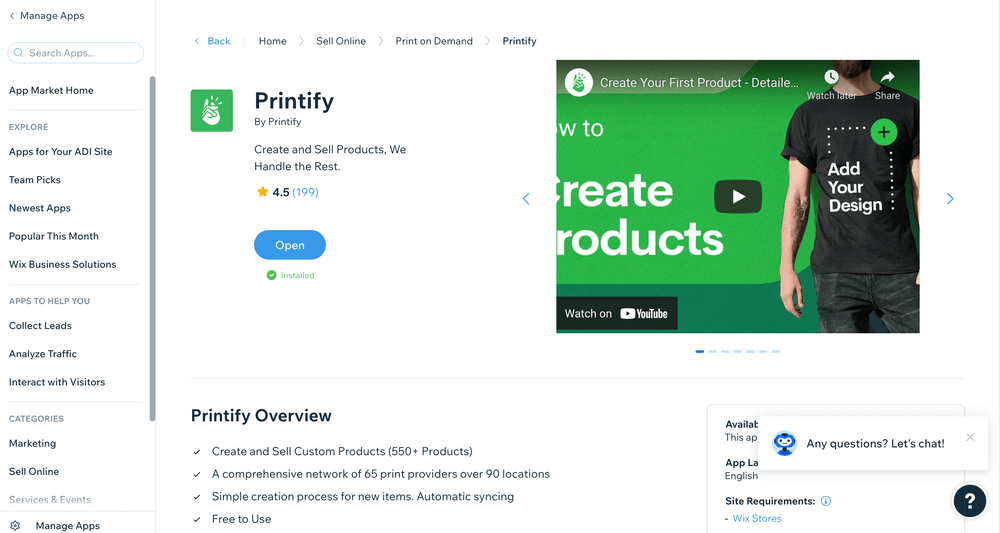
- Search for Printify in the Wix App Market.
- Click Add to Site and choose which Wix website you want to integrate.
- Authorize.
- Publish the products at Printify, and the listings will be created automatically at the Wix site.
- Modifications made in the products at Printify will be reflected at Wix.
Don’t miss our video describing the process.
Wrapping Up
Wix is a well-rounded and affordable option for creating a middle-sized business website. Wix makes it easy to build a website and does not require coding, while its ADI and templates allow designing beautiful pages for everyone. Wix apps provide a range of extra eCommerce solutions.
Integrating with Printify is an assured way to profit from a Wix website and can be done quickly:
- Register With Wix and Setup Your Website
- Design your store, check the results and publish it.
- Integrate Wix With Printify
Now it’s time to do it: create your Wix website, integrate with Printify, and start selling today:
Start Your Wix Website With Printify!
The post How to Create a Wix Website: Building a Store From Scratch appeared first on Printify.


